DIY Guide: Repairing Curb Rash on Your Wheels
If you’re passionate about keeping your car in top shape, you’ve likely heard about curb rash. It’s one of those minor but frustrating damages that can spoil the appearance of your wheels. The good news? You can handle Curb Rash Repair Wheels projects yourself at home and save a significant amount of money.
This DIY guide will walk you through everything you need to know about identifying, repairing, and protecting your wheels from curb rash. Whether you’re a beginner or a car care enthusiast, this Curb Rash Repair Wheels guide will give you all the tools you need to achieve professional-looking results.
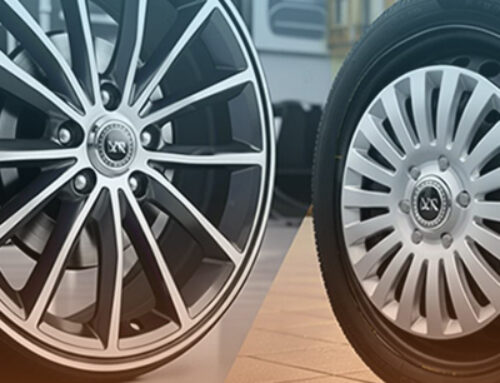
What Is Curb Rash on Wheels?
Curb rash refers to the scuffs, scratches, and gouges that occur on the surface of your wheel when it comes into contact with a curb or similar obstacle.
Common causes of curb rash include:
-
Scraping against a curb while parking.
-
Tight maneuvering in narrow spaces.
-
Misjudging distances during turns.
It’s important to note the difference between cosmetic and structural damage:
-
Cosmetic curb rash only affects the surface and can be easily repaired at home.
-
Structural damage compromises the wheel’s integrity and usually requires professional repair.
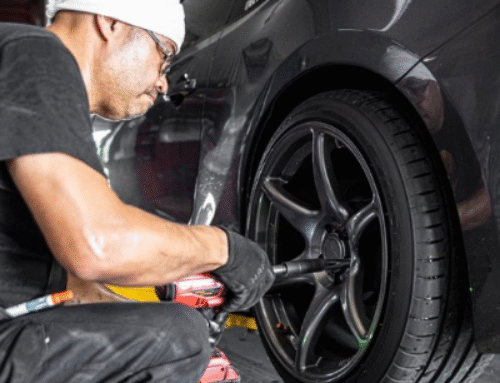
Can You Repair Curb Rash at Home?
Absolutely! If the damage is purely cosmetic, Curb Rash Repair Wheels projects are perfectly doable with a bit of patience and the right materials.
DIY Curb Rash Repair Wheels is ideal when:
-
Scratches or scuffs are shallow.
-
The wheel isn’t bent, cracked, or severely gouged.
-
You’re comfortable working with sanding and painting techniques.
Seek professional help if you encounter:
-
Deep cracks or bends.
-
Extensive structural damage.
-
High-end wheels needing a perfect factory finish.
Materials Needed for DIY Curb Rash Repair Wheels
Before you start, gather these materials:
-
Sandpaper (240 to 600 grit)
-
Masking tape
-
Automotive putty or metal filler
-
Primer (wheel-specific)
-
Wheel paint (color-matched)
-
Clear coat or sealant
-
Microfiber cloths
-
Rubbing alcohol or degreaser
-
Gloves, dust mask, safety glasses
Having everything prepared in advance makes the Curb Rash Repair Wheels process smoother and more efficient.
Step-by-Step Guide to Repairing Curb Rash Repair Wheels
Follow these steps for a professional-looking finish:
1. Clean the Damaged Area
-
Wash thoroughly with soap and water.
-
Use rubbing alcohol or degreaser to remove any residues.
2. Sand the Affected Area
-
Start with 240-grit sandpaper to smooth out scratches.
-
Progress to finer grits (400-600) for a polished finish.
3. Apply Filler (If Needed)
-
Fill deeper gouges with automotive putty or metal filler.
-
Let it dry, then sand smooth.
4. Mask Off the Tire and Undamaged Areas
-
Protect with masking tape and paper.
5. Apply Primer
-
Light coat over repaired area, dry completely, then lightly sand.
6. Apply Matching Paint
-
Spray thin, even layers, allowing drying time between coats.
7. Apply Clear Coat
-
Add a few layers for protection and shine.
8. Final Touches
-
Once fully cured, polish lightly if needed.
Tips for a Professional Finish
-
Work dust-free: Dust ruins finishes.
-
Be patient: Allow each coat to dry.
-
Color match carefully: Use the wheel’s paint code.
-
Use safety gear: Protect yourself during sanding and painting.
FAQs About Curb Rash Repair Wheels
✅ Can I repair curb rash at home without experience?
➡️ Yes! With patience and the right materials, beginners can successfully complete a Curb Rash Repair Wheels project.
✅ How long does it take?
➡️ Typically 3 to 6 hours, depending on damage and drying times.
✅ What if I don’t repair curb rash?
➡️ Untreated curb rash can lead to corrosion, lower resale value, and potential safety risks.
✅ Does DIY repair affect wheel durability?
➡️ No — if done properly, cosmetic repairs won’t impact structural integrity.
✅ Repair or replace badly damaged wheels?
➡️ Severe damage should be handled by professionals or replaced entirely.
✅ How to prevent future curb rash?
-
Park carefully.
-
Install rim protectors.
-
Practice slow, controlled maneuvers near curbs.
Fixing Curb Rash Repair Wheels damage at home is not only cost-effective but also incredibly rewarding. With the right tools, a bit of patience, and attention to detail, you can restore your wheels to near-new condition. Early action is key — addressing Curb Rash Repair Wheels issues promptly prevents further deterioration and keeps your car looking its best. However, always remember: if the damage looks serious or structural, seeking professional help is the safest route.
If you’re wondering whether you can simply paint over curb rash, it’s important to understand the proper process to ensure lasting results. Discover why preparation is key before grabbing that spray can — Can You Just Paint Over Curb Rash?
At Wheels Doctor Miami, we provide expert wheel repair, refinishing, powder coating, and customization services. Our mission is to deliver exceptional craftsmanship, innovative solutions, and outstanding customer care to keep your wheels safe, stylish, and road-ready.
Need assistance? Contact us today (305) 490-2028 | (305) 964-7909. — we’re here to help!